Introduction
Thank you for your interest in this plugin. If you have any questions that are beyond the scope of this help documentation, please feel free to email us at realwebcare @ gmail dot com. We’d be happy to help you.
installation
Installing 'WRC Pricing Tables Standard' Plugin is as simple as installing any other WordPress Plugin. If you don't know how to install plugins, please review the two options below:
1. Install by ZIP File
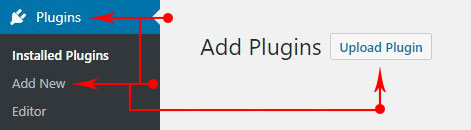
1 - Go to the WordPress admin panel and then navigate to Plugins > Add New > Upload.
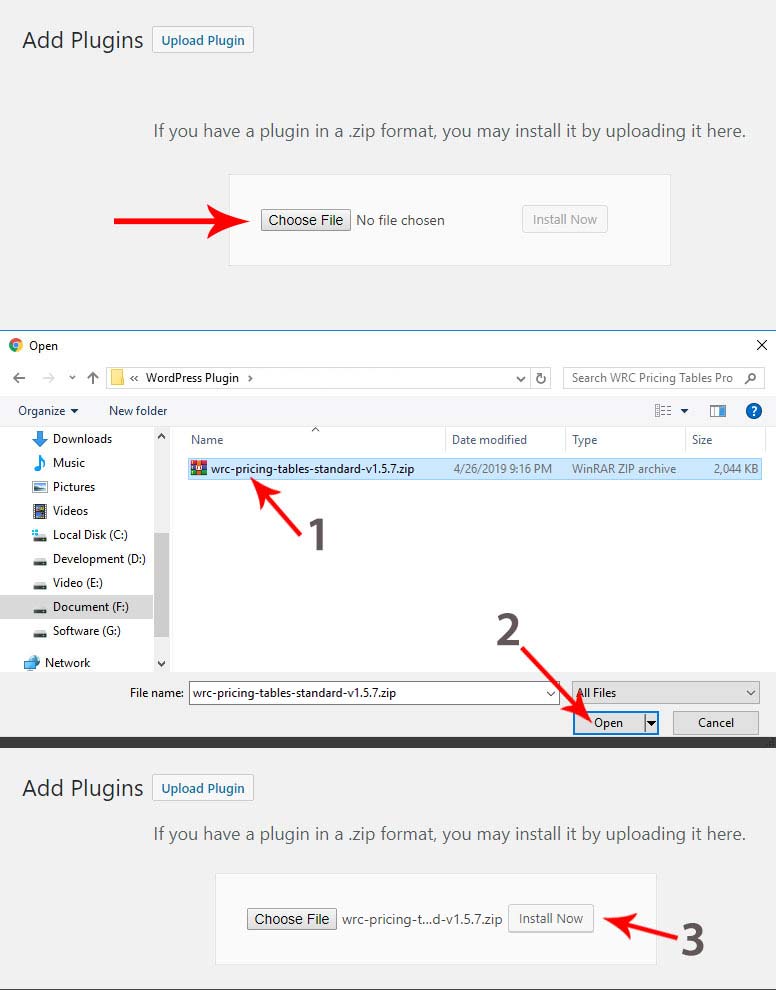
2 - Choose the plugin zip file named as wrc-pricing-tables-standard-v1.5.7.zip and click the Install Now button
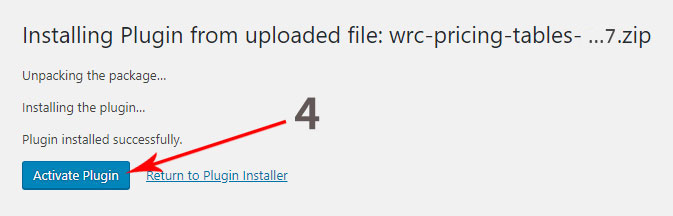
3 - Wait untill the installation process ends. When you will see the text, Plugin installed successfully click on Activate Plugin button.
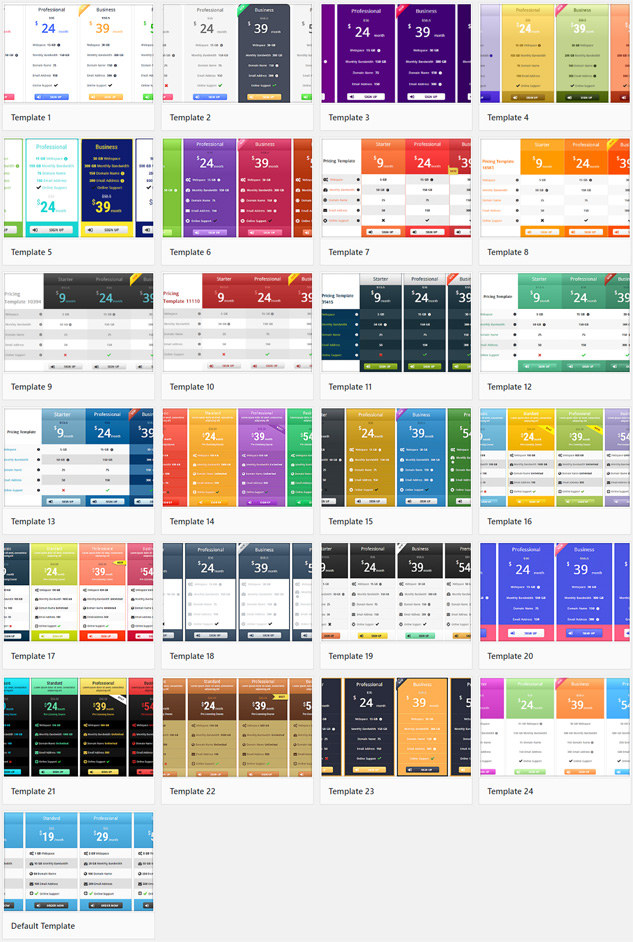
4- Congratulations! you are ready to create your pricing table. Click on Templates link to create a pricing table from 25 ready-made templates.

2. Install by FTP
Quick Start
From WordPress admin panel, navigate to Pricing Tables > Templates. Select your table from 20+ ready-made templates and click on Create Table button on mouse over. You will get a ready-made pricing table instantly! Navigate to All Pricing Tables and start configuring table content.
Add New Table & Features
1. Navigate to Pricing Tables >> All Pricing Tables and click on Add New button to add new pricing table.

2. Enter the pricing table name as well as corresponding pricing column features. The column features are divided into five parts are as follows:
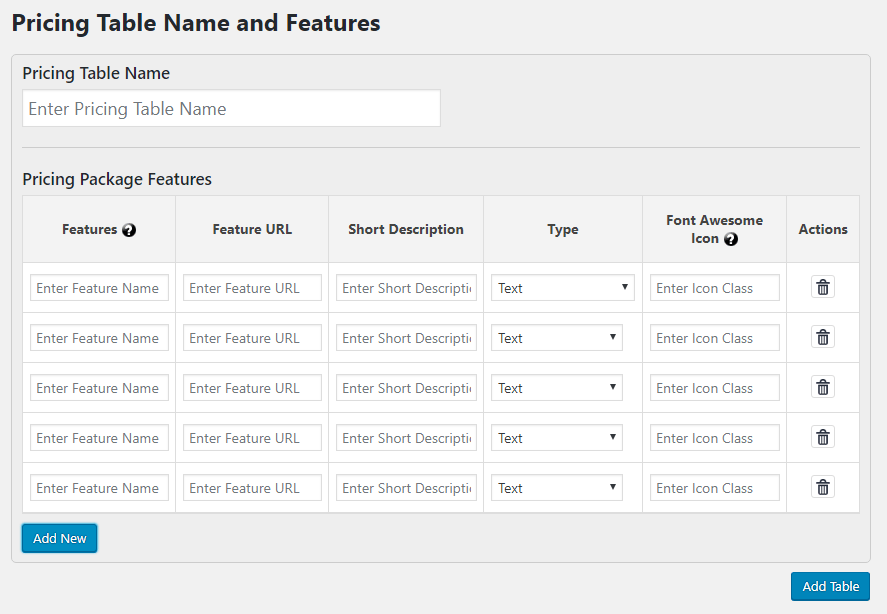
Finally, click on Add Table button.
Add Columns
3. Mouse over on your recently created pricing table and click on Add Columns link. You can add as many pricing table columns as you want. There are three sections for each column:

3.1 Pricing Column Details
There are 6 sections here:
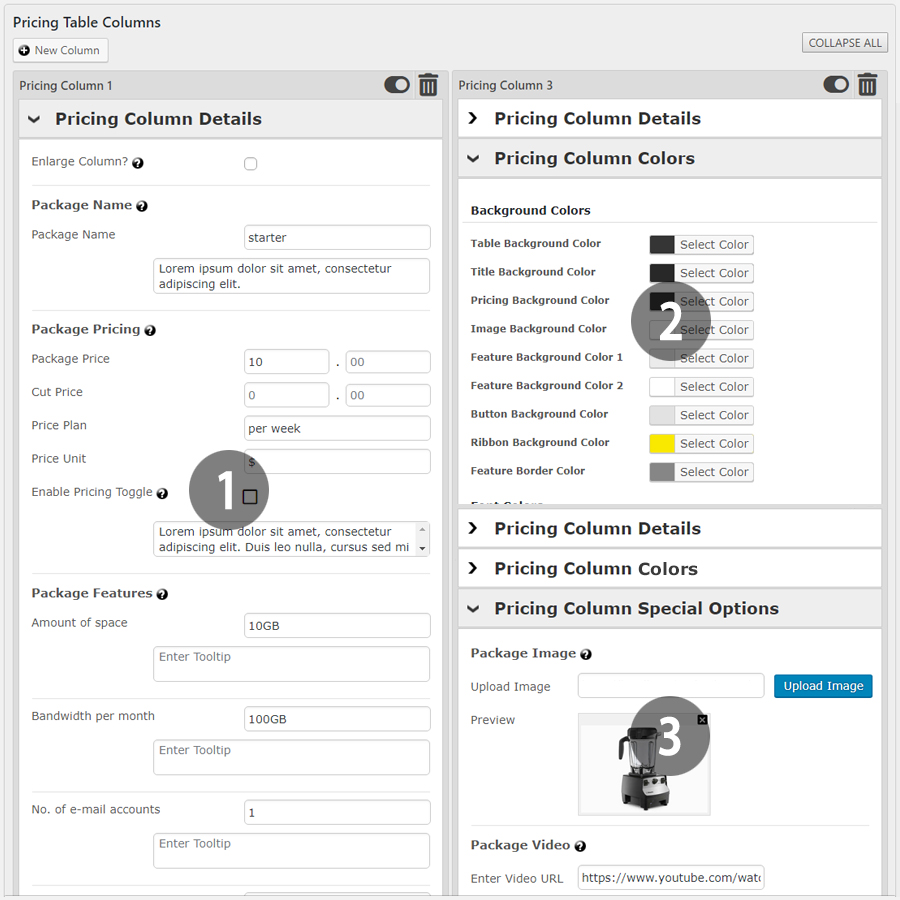
- Enlarge Column: Mark the checkbox to make a package special. It will make the column slightly larger than the others columns.
- Package Name: Enter package name here. You can give a short description also in the textarea field.
- Package Price: Enter package prices here. Package price is the current price and Cut Price is the previous price. Enable Pricing Toggle if you want to show another price for this package.
- Package Feature: Enter package features here. Feature input field will be set as you have declared feture type in the Edit Feature section. Each feature has a tooltip box, where you can give a summary of the feature. It will appear as a tooltip in the pricing table.
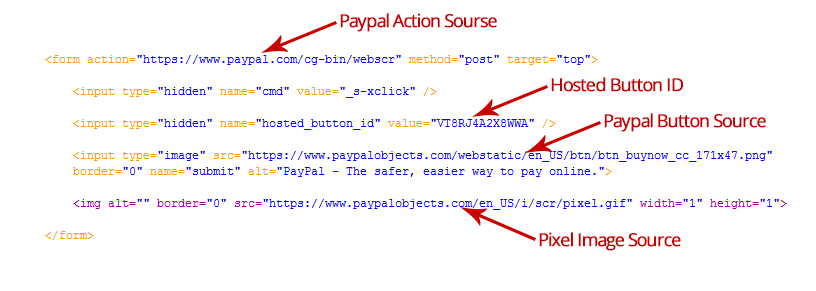
- Package Button: Enter button text, URL and font awesome icon class here. You can add PayPal button by enabling PayPal Code. See the below image and fillup necessary fields for PayPal button.
- Package Ribbon: Enter ribbon text here to make the package more attractive.
3.2 Pricing Column Colors
In this section, you can select colors for your pricing table by the help of ColorPicker. It is divided into three categories:
3.3 Pricing Column Special Options
This is special because this section will help you to give a better visual appeal to boost the attractiveness of your pricing table by including images or videos on your packages. By using the WordPress Media Uploader you can easily add images for each package individually. You can also add videos (YouTube only) for each package by entering the YouTube video URL in the given text field. If Package Image or Video is enabled in General Settings under Pricing Table Settings, it will be displayed along with the packages. You can also set image width, height, margin and opacity in General Settings. It will help you to show the accurate size of the image in the pricing table. Similarly, height of the video should be set for the video.
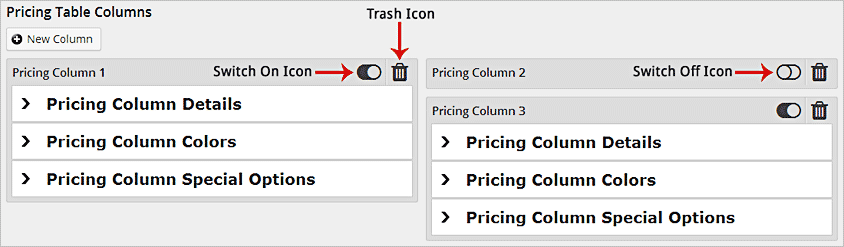
Hide or Delete Columns
4. There is a Trash icon on the top right of each column to delete the column. There is also a Switch On/Off icon next to the each trash icon to disable / hide a column instead of deleting it. You can reactivate the column again by clicking on the Switch Off icon.
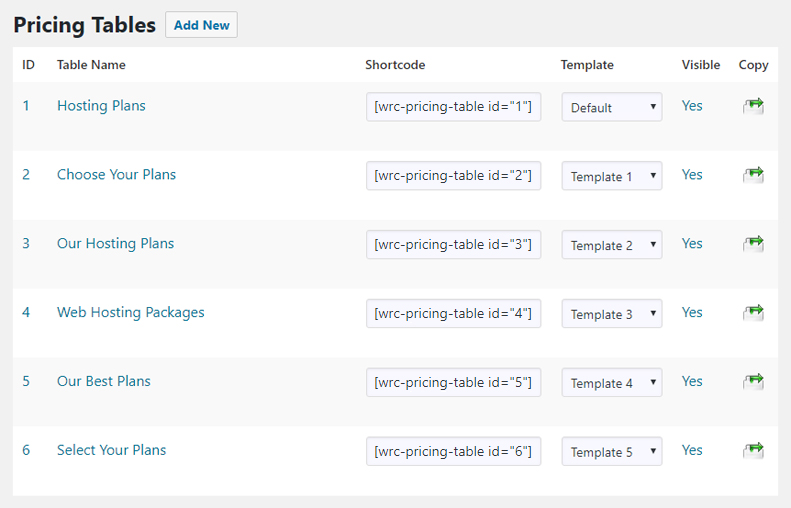
Shortcode
5. After completing all the necessary fields for your pricing column click on Add Package button. Then you will get a SHORTCODE of newly created pricing table with an unique ID, which will be generated automatically. Now, paste the shortcode in your posts or pages where you would like to show pricing table and publish. Visit the newly created post/page to see the magic! :)
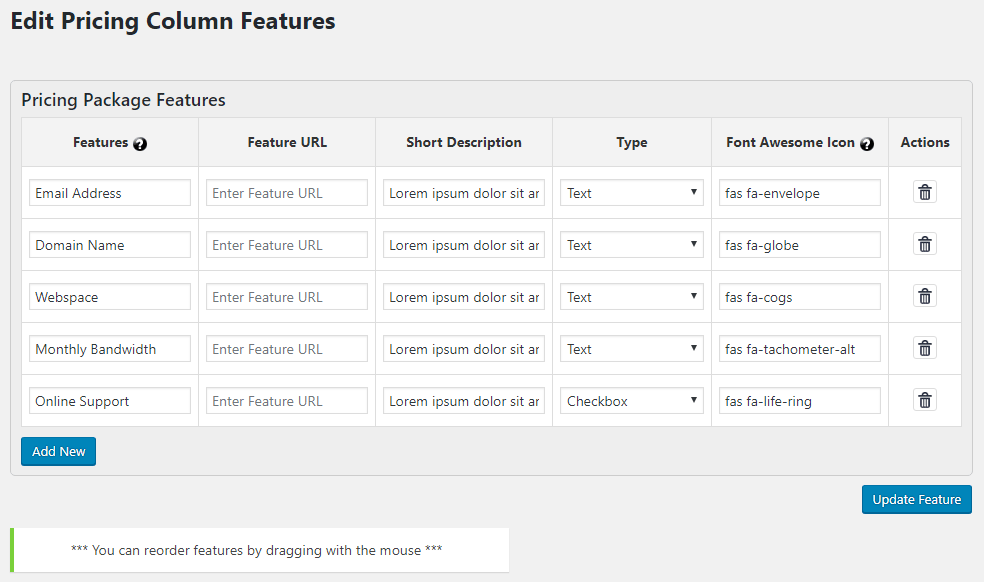
edit features
6. You can Edit, Delete and Reorder pricing column features at any time by clicking on the Edit Features link in the pricing table lists.
general settings
At first, you have to enable the pricing table to display. You can also change the table name here. There are several options here are as below:
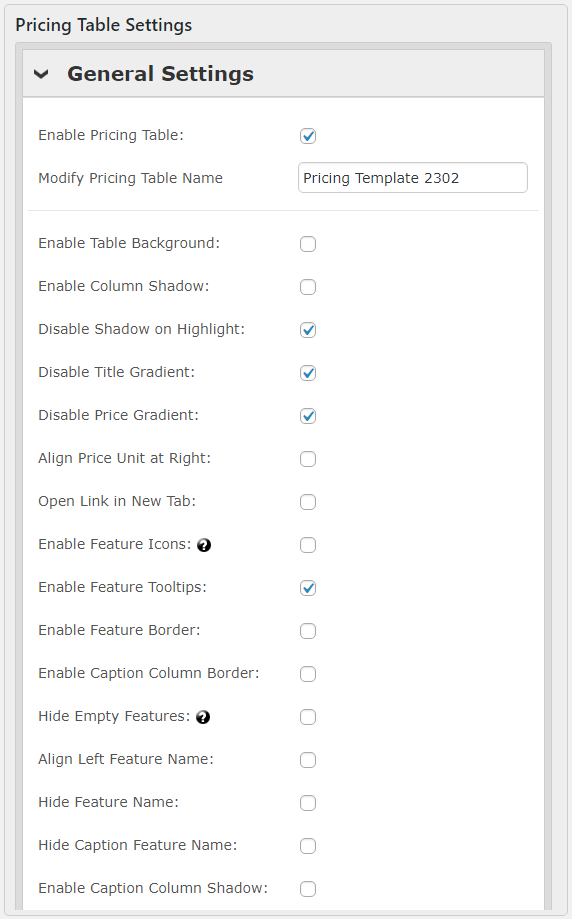
- Enable Table Background: Enable this option to show column border.
- Column Shadow: Enable pricing column and caption column shadow here. You can disable column shadow on highlight by unchecking the checkbox.
- Column Gradient: Enable/Disable title, price and button section's background gradient here.
- Align Price Unit at Right: If your price unit comes at right of the price, you can set price unit at right by marking the checkbox.
- Column Features: Enable or disable feature icons (font awesome) and tooltips.
- Column Border: Enable feature border and caption column border here.
- Show/Hide: Hide Empty Features option will hide those features which are empty. Hide Feature Name and Hide Caption Feature Name will hide feature value and feature name.
- Display Price at the Bottom: Mark this checkbox to set price at bottom instead of top of the pricing column.
- Price Toggle: To display pricing toggle, mark Enable Pricing Toggles checkbox. It will open 3 textbox fields, where you can enter toggle texts, e.g. monthly and yearly. Special Text field is for any kind offer if you have for the second toggle.
- Package Ribbons: Enable ribbon by marking the checkbox here. The table has 5 different types of ribbons to show.

- Package Image: To display image in price section of each column, mark the checkbox here. You will get 6 options here:
- Choose how you like to display Images: Here you have to select how to display image. You can display images with/without price and title.
- Image Width: Enter width of the image here.
- Image Height: Enter height of the image here.
- Image Margin: Enter image margin here. It will help you to place the image in the column properly. If you want to set image at the middle center, just enter auto.
- Image Opacity: To display price on image more clearly, you can set an opacity of the image.
- Package Video: To display video (YouTube Only) in price section of each column, mark the checkbox here. You will get 4 options here:
- Choose how you like to display Video: Here you have to select how to display video. You can display videos with/without price and title same as images.
- Video Height: Enter height of the video here.
- Allow Full Screen?: Mark this checkbox to allow full screen on YouTube video.
- Show YouTube logo?: Mark this checkbox to show YouTube logo on player.
- Tick/Cross Icons: Select your preferred tick and cross icon from 20 different icons. You can also use font awesome tick and cross icon by enabling Enable Font Awesome Tick/Cross. You just need to enter font awesome icon class for tick and cross icon.
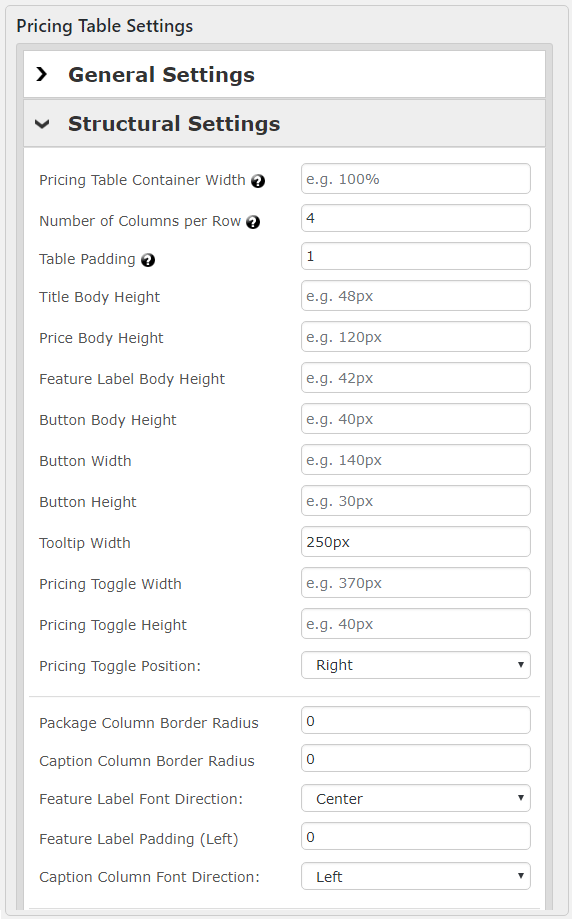
structural settings
Here you can set the structural options of the pricing table.
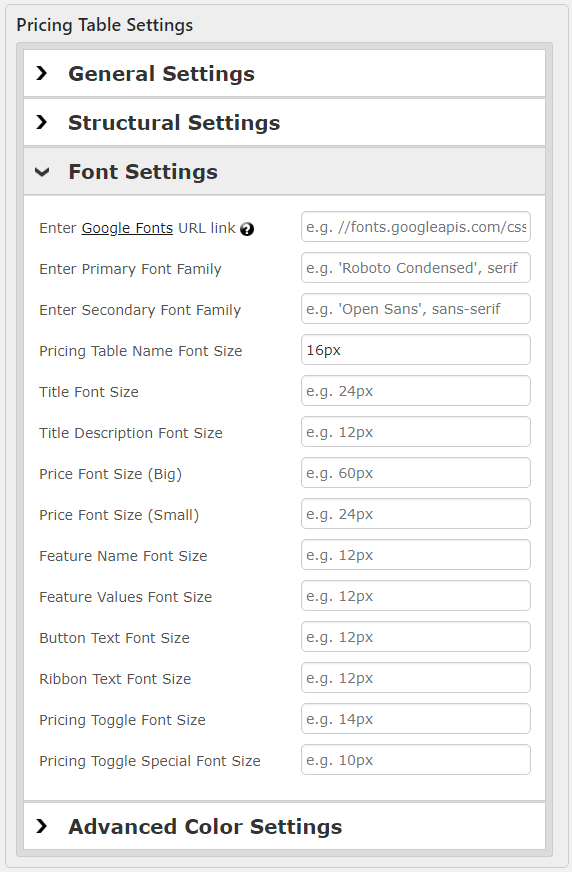
font settings
Here, you can set font family and font size for the pricing table.
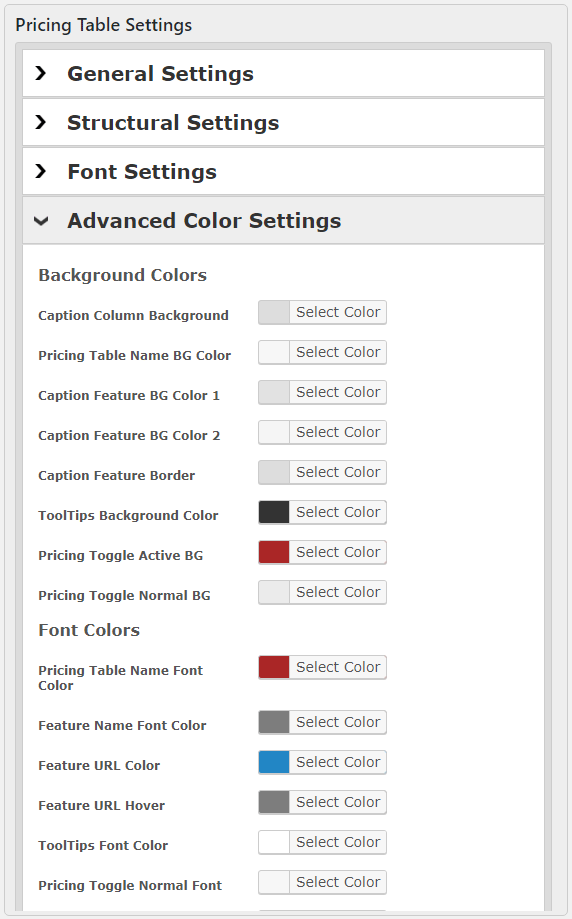
advanced color settings
Advanced Color Settings is for the common items of the pricing table. For example, if the caption column is enabled, then the column color can be selected. You can also change the background color of tooltip as well as it's font color. Column Shadow Color and Shadow Highlighted Color can also be selected here.
export table
Export Table:
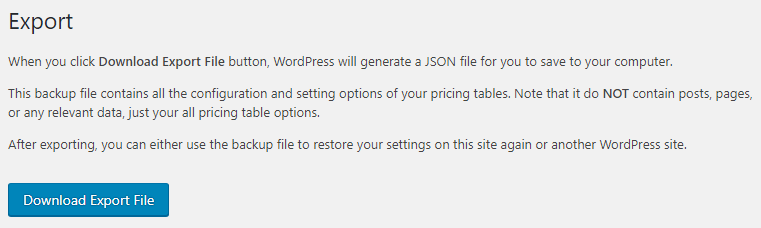
Click on Download Export File button to generate a JSON file for you to save in your computer. This backup file contains all the configuration and setting options of your pricing tables. Note that it do NOT contain posts, pages, or any relevant data, just your all pricing table options. After exporting, you can either use the backup file to restore your settings on this site again or another WordPress site.
import table
Import Table:

Select a json file to upload that you exported before from Export Table, and click on Upload file and import. Wordpress do the rest for you.
Video Demo
Sources & Credits
I've used the following fonts, icons or other files as listed.